Tag Archives: diy

DIY desk tray

post

DIY desk tray - by Coco LapineDIY desk tray - by Coco LapineDIY desk tray - by Coco LapineDIY desk tray - by Coco LapineDIY desk tray - by Coco Lapine

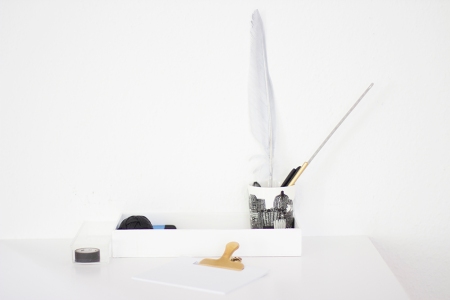
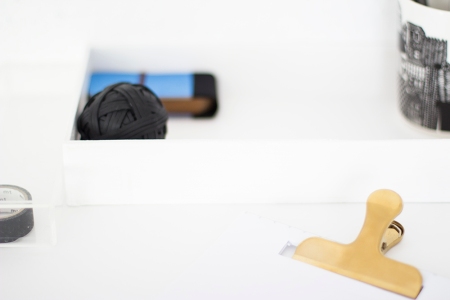
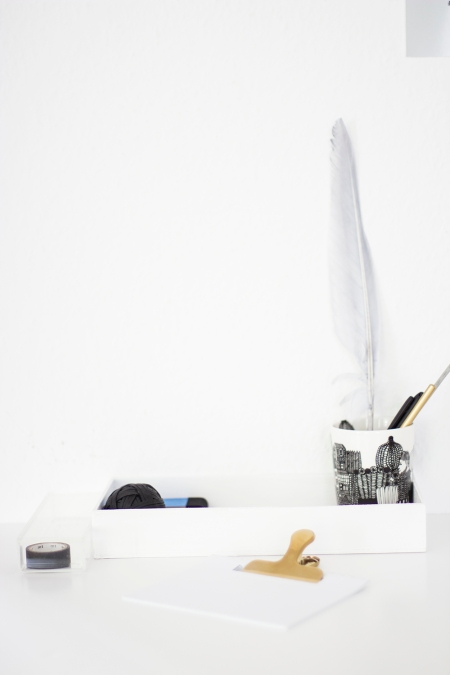
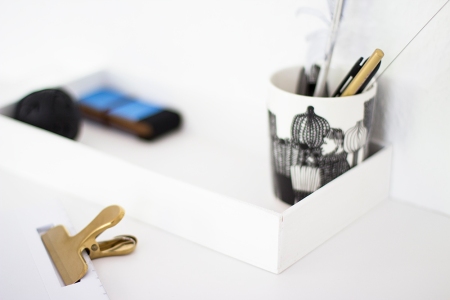
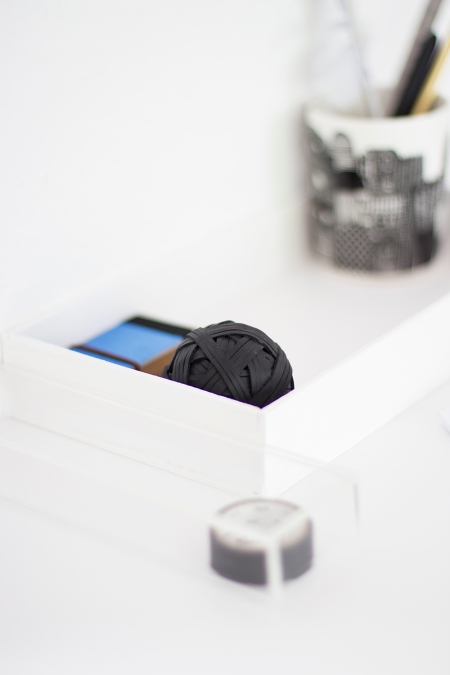
Over the weekend I made this DIY tray to put on my desk for some of my office supplies. I think it turned out quite nice, so I decide to share it with you on the blog. I used a very lightweight wood, actually it’s almost like cardboard. You can find it in any do-it-yourself store. This wood is not made to make sturdy things, but for a desk tray it’s perfectly fine and the big advantage is that it’s very easy to cut with a normal hand saw (no heavy tools required). I cut out the bottom part and the four sides separately and glued them together with wood glue. When the glue dried completely, I painted the tray white (it needed two layers).

Dit weekend maakte ik dit plateautje voor op mijn bureau om een paar kantoorspulletjes in kwijt te geraken. Ik vond dat het resultaat er wel mocht zijn, daarom besloot ik het met jullie te delen. Ik heb een super licht hout gebruikt (bijna zo licht als karton). Je kan het in alle doe-het-zelf zaken kopen. Je kan er geen echt stevige dingen mee maken, maar voor dit plateautje is het wel geschikt. Het grote voordeel van dit hout is ook dat het heel makkelijk zaagt met een gewone handzaag. Ik heb het onderstuk en de vier kanten apart uitgesneden en dan aan elkaar gelijmd. Wanneer de lijm droog was heb ik het ook nog een laagje witte verf gegeven (twee laagjes om specifiek te zijn).

Posted in DIY | Tagged , , , , | 6 Comments

DIY Christmas wrapping with a wooden touch

post

I guess everybody is (or will be) very busy  buying and wrapping Christmas presents these days, so I tought I would share a DIY I tried out on my Christmas presents this year. I bought wooden stars in the craft store and drilled two holes in each of them. Wrap your present, put your ribbon through the holes in the stars, turn it around the present and make a small knot behind the star, so it will be hidden.  Happy wrapping !

DIY Christmas wrapping - Coco Lapine blog DIY Christmas wrapping - Coco Lapine blog

Posted in DIY | Tagged , , , | 2 Comments

DIY Chistmas envelopes

post

It’s always nice to attach a card to a Christmas present and what better way to do it than in a self-made envelope ? I decided to keep it simple and used marble and concrete texture prints. I cut out the four corners of the paper and folded the flaps. For the closure on the back, I used a black dot sticker. On the front I attached a little message with a Masking Tape.

Diy christmas envelopes - by Coco Lapine blog

Diy christmas envelopes - by Coco Lapine blog

envelope3

Posted in Design, DIY | Tagged , , , , | Leave a comment

// Quilted Bench Cushion Tutorial

post

This weekend I made this bench cushion, inspired by the Pia Wallen blanket that’s so popular nowadays. First I made a square quilt top and after I constructed it into a pillow.
I made it for the Molger bench from Ikea, but with a little bit of adjustments in size, it should be possible to make for any kind of bench or chair.

The materials you will need for this tutorial:
– Two colors of cotton (I used about 1m black and 20cm white)
– Foam for the inside of the pillow (2 cm thickness)
– Ruler, scissors and threaded sewing machine
– Zipper (40cm or shorter)

First, cut out all the pieces for the quilt itself (you will have to cut a lot of squares). I used a seam allowance of 1 cm (included in the measurements) so it would be easy to iron the seams open. Than cut the foam and the pillow parts.

After you cut all the pieces, you can set the pillow parts aside and start assembling the quilt top.

01. First you will make strips of each 10 rectangles, sewn together, like in the picture. In total you will assemble 19 of those strips. When the strips are ready, iron the seams open.

02. Sew all strips together like shown in the illustration, and iron the new seams open. Your quilt top is now ready for assembly.

After the quilt top is finished, assemble the pillow with the other pieces.

01. Fold pieces 5 like shown in the pictures, and stitch it to the zipper end, so the total length of this piece is 40 cm (if bigger, you can cut this later on).

02. Sew pieces 4 on the sides of the zipper. After this, cut excess fabric that could be there so the size of the total zipper piece is as big as piece 3.

Here you can find further explanation of the assembly of the zipper. It’s actually a tutorial for a clutch, but the zipper principle is the same.

03. Sew the zipper piece, piece 3 and pieces 2 together on the sides (seam allowance 1cm) and make a rectangle. These pieces sewn together will form the sides of the pillow.

04. Pin the side pieces to the quilt top (right sides facing each other) and sew together.

05. Open the zipper

06. Repeat step 04, attaching piece 1 to the pillow.

07. Turn the whole thing inside out through the zipper hole, insert the foam and voila, your pillow is ready to be used!

Posted in Design, DIY, Interior Inspiration | Tagged , , , , , , , , , | 4 Comments

// DIY Rounded Tote Bag

post

I made a rounded tot bag for my mom. She needed a purse she could carry all her music sheets in, so I made a big and sturdy purse with a zipper on the top. For the outside I used thick cotton and for the inside I used the fabric of an old dress. The handles are made from an old leather jacket. I took me a long time to make this purse because it was the first time I put a zipper in a purse like this. But I think it turned out quit nice, what do you think ?

Posted in DIY | Tagged , , , , | 6 Comments

// DIY Wood Bead Potholder

post

As you might have noticed from this post, I like wood beads. This time I bought some bigger beads, to make a wood bead potholder. I used a neon yellow string with it, because I like the combination of the shouting neon with the natural and calm wood texture.

I went to the craft store and bought 15 Wood beads (diameter 30mm / about 1,2 inch) and a stretch chord. You put all 15 beads on the stretch chord and make a double loop on the end. I pulled the chord a bit so my circle would be tight enough. Then I hid the two ends in the last two beads so they weren’t visible and voila, done. A quick and simple DIY project to make a nice new design object for your dining table.

Posted in Design, DIY, Interior Inspiration | Tagged , , , , , , , | Leave a comment

// DIY Diamond Tote Bag

post

Today I tried out a tutorial from Misusu, to make a Diamond Tote Bag. Even though it took me quit a while to cut out all the triangles, and assemble them in the right order, I’m really happy with the results. If you would like to try out a diamond tote yourself, you can find it here.

For the outside of the purse I used a striped cotton. You have to puzzle the pieces together a little bit, but it’s well indicated on the pattern which directions the stripes should be on each triangle. For the bottom I used a sturdier dark blue (from the rest of the fabric of our curtains) and for the inside a lightweight, bright blue cotton (from an old table cloth). For the handles I used leather from an old jacket and the same blue cotton from the bottom of the purse.

Posted in DIY | Tagged , , , , , | Leave a comment

// DIY Reversible Bag

post

This week I made a Reversible Bag with the pattern and instructions of Very Purple Person. For one side of the Bag I used a blue polka dot fabric and for the other one I used an old jeans shirt from my boyfriend. The shirt had a pocket on the chest, which I reused as a pocket on the purse. I enjoyed making this purse a lot. The instructions are very clear and straight forward and I had the bag finished in about two hours. I recommend trying this one out! All you need is some fabric and two hours of spare time.

Posted in DIY | Tagged , | 2 Comments